DIY Projects & Crafts
Home Decor Crafts
Hanging Shelves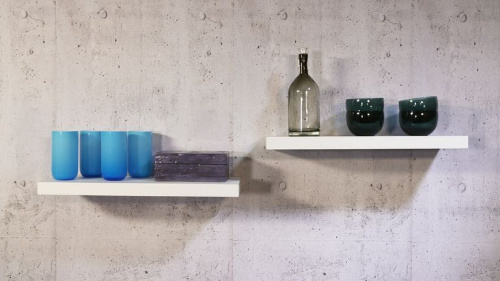
Hanging shelves are a fun way to spruce up empty wall space! You can hang them in 5 easy steps.
1. Select Your Shelves: Each type of hanging shelve have slightly different mechanisms, but the common denominator is the use of an invisible, wall mounted bracket that holds the shelves in place.
2. Determine Shelf Placement: Figure out where you want to place your shelves. Do you want them centered over furniture or spread out across a wall? Once the placement is determined, hold the shelves in place while you draw a marking line on the wall. Be sure to use a level for an accurate line.
3. Trace Brackets: Hold your shelf brackets to the wall & trace the screw holes using your marking line as a guide. If drywall anchors are needed, drill these in where marked. If not, continue to step 4.
4. Attach Brackets: Drill the screws through the brackets into the wall using your traced marks as a guide. Start with the middle screws and ensure they are level before you attach the final screws.
5. Attach Shelves: All that is left is sliding the shelves over the brackets! If your set includes a securing screw, but sure to attach that as well.
Key Holder
.jpg)
Tired of misplacing your keys? Create this fun spot to hang your keys as soon as you walk in the door! It would also make a great gift for a friend. All you need is pliable wire, a wire cutter/pliers, and a stencil.
1. Make A Stencil: Make a stencil of what you want your key holder to say. Make sure you do this on a large canvas if you want your key holder to be bigger. You can handwrite it or use your computer and print it out. Use a cursive font because all of the letters need to be connected.
2. Fold & Loop Your Wire: Start at one end of your wire and begin to fold your wire to form your letters. Pretend you are writing in cursive, but with wire and use your stencil as a visual guide. Go slowly and use your pliers as needed. If you have more than one word, leave a long straight piece of wire after the word for a space, and go straight into your next word.
3. Make The Key Holder: To make the hooks to hang your keys on, cut off a 3 inch piece of wire. Fold it in half and bend the top part over slightly and curl the two edges into itself.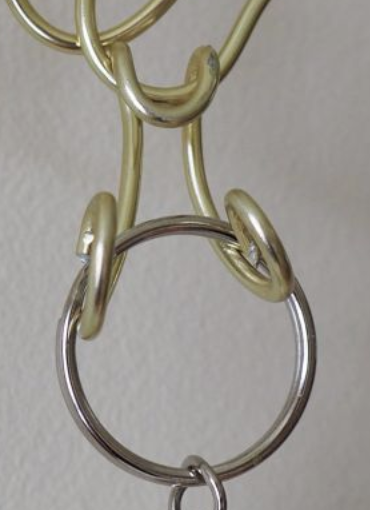
Photo Board
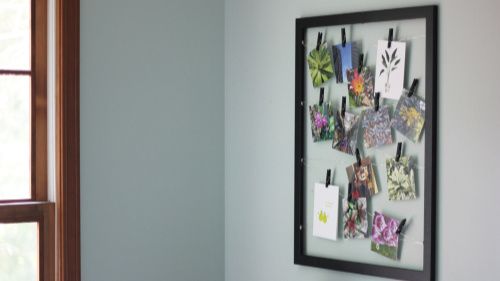
Instead of spending money on frames for individual pictures, you can create a piece of art to hang multiple pictures that hold precious memories for much cheaper. All you need is a frame, some wire, thumbtacks, mini clothespins, and 10-20 of your favorite photos.
1. Disassemble The Frame: Whatever frame you choose, you will only need the exterior of the frame. Remove the backing, padding, and glass.
2. Organize Your Photos: Once you've picked out what photos you'd like to use, lay down the frame and organize your photos to get a sense of how many will fit in the frame. Make sure to give each photograph some space to be seen, but if you'd like to overlap and layer then go for it!
3. Set Up The Wire: Now that you have your photos spaced out, it's time to set up the wire. The spacing of your wire is determined by how many photos you want framed. Use a thumbtack and *lightly* hammer or press it into the interior grooves of the frame. You will do this process down one side of the frame. When one side is completed, move to the other side. Be sure to place the tacks directly across from the first set so your pictures hang evenly.
4. Thread The Wire: Once the tacks are secured, thread the wire around the top tack. String it across the frame to the direct opposite tack. Continue this process back and forth until you've reached the bottom tack. If you have extra wire when you're finished, simply trim it off.
5. Place Your Clothespins & Hang Photos: Place the clothespins on the wire and attach the photos (if not attached already). You can use different colored clothespins for a more colorful look, or keep it neutral for a more modern look.
Kid Friendly Crafts
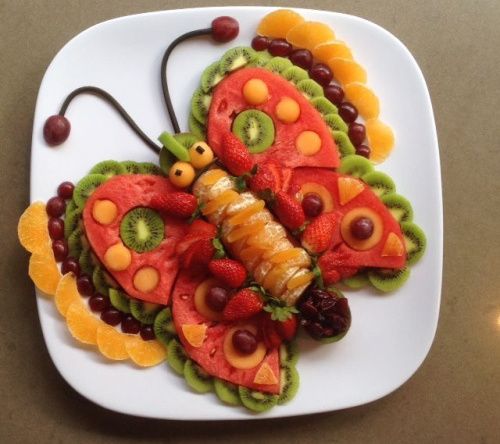
Butterfly Fruit Pizza
Making a butterfly fruit pizza is a fun way to get the whole family in the kitchen together! And you get to enjoy a tasty treat afterwards. Use a large cookie as the base. You can make this from scratch, or buy it pre-made. It makes for an easy canvas for a bright arrangement of fruit. To get the butterfly shape, simply print out an outline of a butterfly and use it as a stencil. The size of the butterfly will depend on how large you want your fruit pizza to be. Because butterflies have a variety of patterns, this is a great way to tap into your creative side & use all of your favorite, colorful fruits.
.jpg?w=851)
Hula Hoop T-Shirt Rug
Not only is this is such a fun way to get rid of old t-shirts, but it's fun for kids & they get to use it in their room or play room! If you don't have enough t-shirts, thrift stores are a great way to find more. Cut the t-shirts into 1 inch strips off of the shirts all the way up to the armpits of the shirt. You will end up with a bunch of 1 inch loops. Next, loop 11 loops over a hula hoop. Start with one at 12 o'clock and 6 o'clock, then 3 o'clock and 6 o'clock. Continue this around the hula hoop. Loop the t-shirts through the warps when you start to weave. If you have empty space, you can add in more loops around the hula hoop, and weave in more t-shirts through the warps. Find detailed instructions here.

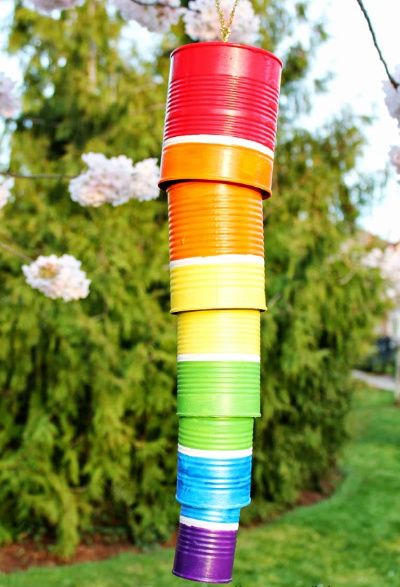
Rainbow Wind Chimes
Rainbow wind chimes are a fun way to craft with your kids & decorate your front porch or garden. You'll need 5 tin cans in different sizes that fit together, Martha Stewart patterning tape, chalk paint or white primer, outdoor or multi-surface paint, a hammer & nail, and metallic gold pipe cleaners. First, prime the cans using the chalk paint or white primer. Next, use the patterning tape to mark off sections you'd like to paint. Once sectioned off, paint your cans. Use whatever colors you'd like! When the cans are dry, remove the patterning tape. Using the hammer and nail, punch a hole in the top of each can. Now we're ready to connect them. Tie a knot in the bottom of one of the pipe cleaners and place it through the smallest can. You want the INSIDE of the can to rest on the knot. Figure out where you want the second can to rest on the bottom can, and tie another knot. Thread that can onto the pipe cleaner. Repeat this process with the remaining cans, and connect another pipe cleaner if necessary. Once you get to the last can, make a loop at the top so you can hang your wind chime.